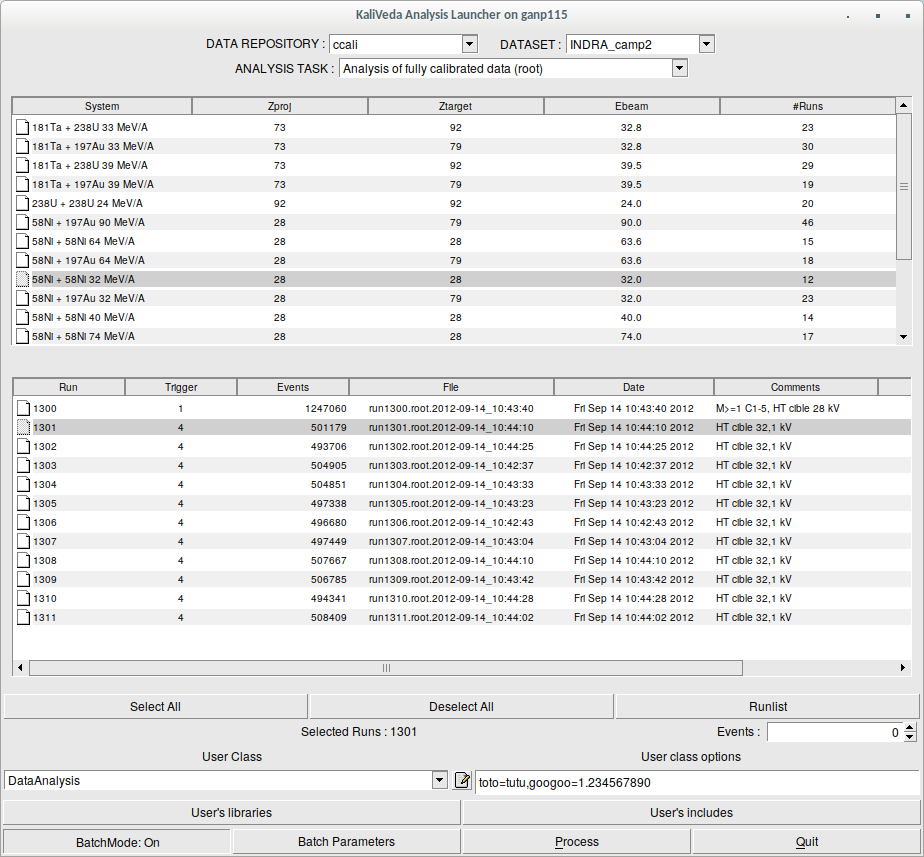
Figure 1: The KaliVedaGUI graphical interface
This GUI can be used to run user analyses of data stored in different data repositories, either on the local machine or in some remote site (such as the IN2P3 computing centre). Analyses can be run interactively, or using different batch systems, including PROOFLite on a machine with several CPU.
To launch the application from the command line, type
$ KaliVedaGUI
Choose a data repository and dataset from the drop-down menus. The ’ANALYSIS TASK’ list will fill with all possible tasks, depending on the types of data which are available in the repository. Picking an analysis task will fill the list of available systems for the data type corresponding to the task. Choose a system and the list of runs will fill with all available files for the given system.
Note that in both system & run lists, clicking on the ’header’ of a column (’Run’, ’Zproj’, ’Trigger’, etc.) will sort the list according to the contents of the column. Subsequent clicks will reverse the order of sorting.
Runs can be chosen individually (left-click on a run), or multiple selections can be made (CTRL-left-click to choose several individual runs, or SHIFT-left-click to select ranges of runs). The buttons below the list (’Select All’, ’Deselect All’) can also be used. The list of currently selected runs is displayed (in an abbreviated format if too long) just below these buttons (“Selected Runs : ...”).
The ’Runlist’ button can be used to enter a list of runs in the form “1-10, 23, 25-29”. Clicking the button opens a dialogue box containing the currently-selected list of runs. After modification, the list display will be updated to reflect the changes.
Putting ’0’ (zero) in the ’Events’ box means ’read all events in each file (run)’. Any non-zero value will limit the number of events analysed, as can be useful for a quick interactive test before batch job submission. Remember to put ’0’ (zero) before submitting a production job! (as this is a common mistake, if you try to submit a batch job with a non-zero number of events to read, a dialogue box will open asking you to confirm this).
If the chosen task requires a user-provided analysis class, the drop-down list ’User Class’ will be activated. This list is filled automatically with the names of all analysis classes in the current directory, which is deduced from the presence of a pair of files with the extensions ’.h’ and ’.cpp’ (or ’.C’ or ’.cxx’). For example, if in the current working directory there are two files called MyAnalysis.h and MyAnalysis.cpp, the ’User Class’ list will contain MyAnalysis.
Clicking on the button next to the ’User Class’ list will open the source files for the currently-selected analysis class in your favourite text editor (defined by the shell variable $EDITOR).
At the end of the list of analysis classes is the entry ’[NEW]’. Selecting this entry will open a dialogue box requiring you to enter a new analysis class name. A fully-working example analysis class with this name will be generated in the working directory and the source files opened in your favourite text editor (defined by the shell variable $EDITOR) for you to adapt it to your needs.
Optional parameters can be supplied to classes for analysis of reconstructed data (derived from KVEventSelector) using the ’User class options’ text box. These are given in the form of a comma-separated list of ’name=value’ pairs as shown in figure 1. These parameters can be manipulated in the analysis class using the KVEventSelector methods
Bool_t IsOptGiven(const Char_t* name)
KVString& GetOpt(const Char_t* name)
For example, in the example shown, part of the selected DataAnalysis analysis class could use the following code:
KVString toto=”titi”; Double_t googoo=-1.;
// Initialisation of parameters for this job
if( IsOptGiven(“toto”) ) toto = GetOpt(“toto”);
if( IsOptGiven(“googoo”) ) googoo = GetOpt(“googoo”).Atof();
// Modify analysis depending on user-supplied values
if( toto == “tutu” ){
TVector3 boost(0,0,googoo);
GetEvent()->SetFrame(“myQPframe”, boost);
}
else if (toto == “titi”){
...
}
Note that any call to method GetOpt(name) should be preceded by a call to IsOptGiven(name) in order to ensure that the required parameter is defined.
 (a)
Select
user
libraries
(a)
Select
user
libraries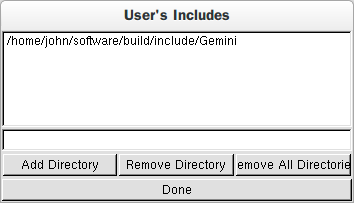 (b)
Select
user
include
directory
(b)
Select
user
include
directory
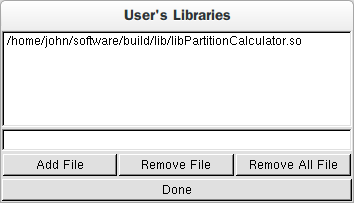
If your analysis requires extra libraries, you can give them by clicking on the ’User’s libraries’ button. In the dialogue box (see figure 2a), click on ’Add File’ and then navigate to and select the shared object (*.so) library you require. If compilation of your analysis class requires access to the ’header’ files associated with the library, click on the ’User’s includes’ button, click on ’Add Directory’ (see figure 2b) and navigate to the directory containing the required ’.h’ files. Note that in order to ’select’ the directory, you must select one of the files in the directory.
important: the shared libraries and include file directories are remembered from one session to another. They will still be defined the next time that you run KaliVedaGUI. If you no longer want to use them, you must click on ’User’s Libraries’ and ’User’s Includes’ and remove them.
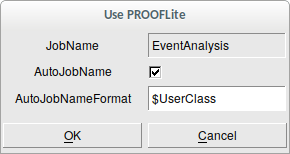
Click on the button to turn ’Batch Mode’ on or off. When on, you can click on ’Batch Parameters’ in order to open a window where you can set the parameters of your batch job(s). The batch system used depends on the currently-defined default batch system (see variable Default.BatchSystem in .kvrootrc configuration file).
The default batch system on a multi-processor PC is PROOFLite (OK, not really a batch system, but it does allow to massively increase the speed of your analysis). The batch parameters GUI is shown in Figure 3. You can either manually enter a job name or select ’AutoJobName’ and enter a name format in the ’AutoJobNameFormat’ box. Hovering over this box will bring up a tooltip showing the valid special variable names you can use (such as $UserClass in the Figure).
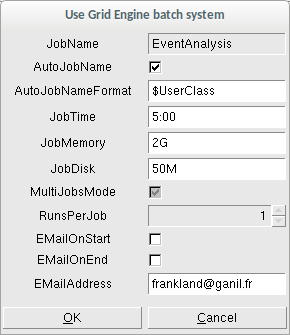
On CCIN2P3 machines, the default batch system is Grid Engine (GE). The batch parameters GUI is shown in Figure 4. In addition to the job name parameters which are common to both PROOFLite and GE, extra parameters are required to define the required limits of ’JobMemory’ (RAM), ’JobDisk’ space (for writing the results of your analysis), and CPU ’JobTime’. Note that the units must be given for memory and scratch disk, which are ’K’, ’M’, ’G’, ’T’ (for kilo-, mega-, giga-, and tera- byte, respectively). ’JobTime’ may be given as seconds, or minutes:seconds, or hours:minutes:seconds.
If more than one run has been selected for analysis, the ’MultiJobsMode’ will be available and active by default. The ’RunsPerJob’ parameter is by default set to ’1’, meaning that a separate batch job will be submitted for each selected run. Increasing this value to N (limited to the number of selected runs) will decrease the number of batch jobs, by submitting a job for every N runs to analyse.
You can choose to receive e-mail notifications at the start and/or end of the submitted jobs, by selecting ’EMailOnStart’ and/or ’EMailOnEnd’. In this case, make sure that ’EMailAddress’ contains a valid address.
Whether in batch or interactive mode, clicking on ’Process’ will first launch the compilation of your analysis class (if one is given). If compilation is unsuccessful, the source files of your class will be automatically opened in your favourite text editor (defined by the shell variable $EDITOR) so that you can correct any mistakes. When the correction is finished, you can close the editor and try ’Process’ again.